  Now that we’re halfway through spring and many of the plants have come up in our gardens, we’re finding ourselves reviewing what’s there and what isn’t. Spring bulbs have been putting on their cheerful show, and we’re looking forward to the summer bulbs and corms. Hardy perennials are emerging into life with all their promise of greenery and colour throughout the coming months. But we may find that some plants haven’t survived and that we have ‘gaps’. Some of these spaces may be best filled with shrubs, giving you that backbone, height and structure that a garden needs.
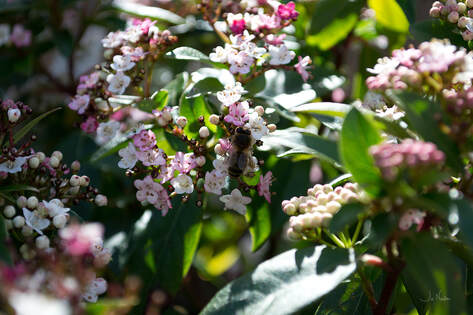
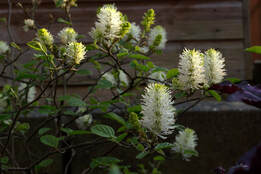
Difficult though it is because there is so much choice, I’ve come up with my top 5 flowering shrubs that would suit most gardens and very importantly, between them, will provide interest all year round. 1. Viburnum tinus: There are quite a lot of Viburnums but ‘tinus’ is one of the evergreen varieties with mid-deep green glossy leaves (see pictured). Perhaps its main attraction is its flowers which last right through from December to April, and what’s more, bees and hoverflies love them! After flowering it develops bunches of blue-black berries. It’s a medium-sized shrub which would suit the middle of a border, or perhaps to the back if you don’t want large plants, and is happy both in sun and part shade. Its weak spot is, like other Viburnums, Viburnum beetle, so if you notice brown notches or patches on leaves, remove them promptly and get rid of all fallen leaves. Other than that Viburnum tinus is a beautiful, good all-rounder shrub which keeps giving. 2. Lavandula angustifolia: I can’t imagine a garden without some Lavender! Within this fully hardy group are the well-known ‘Hidcote’ and ‘Munstead’ varieties much more capable of surviving our UK climate than the French lavenders – at least that’s true here in the northwest of England. Many of us enjoy the smell of lavender as we brush past, and bees and other pollinating insects enjoy the flowers which can last from July to September. 3. Mahonia x media ‘Charity’: Another evergreen shrub, this time with spiky, holly-like leaves and yellow flower-spikes which attract bees and insects (there’s a theme developing here!). They have a beautiful scent –in fact, this winter on a lockdown walk I smelt a Mahonia in a garden we passed before I saw it. Such a pleasure in the middle of winter, this and some of the other Mahonias flower from November to March. They’re taller than Viburnum tinus and can be grown in shade so they’re great plants for something architectural at the back of a shady border. 4. Weigela ‘Florida Variegata’: I’ve chosen this shrub because it is quite different from the others in my list. It is deciduous with variegated foliage, has pretty pink flowers and has a bushy but fairly tall habit with arching stems. The leaves which are grey-green with white edges can really brighten up a border, as do other variegated plants. The pale pink funnel-shaped flowers are quite profuse and can last from May to June, and sometimes beyond. Weigela grows easily on most soils, and once it has reached the height you want it responds well to pruning after flowering (probably to about half its height). 5. Fothergilla major (Mountain witch alder): I’ve saved this special shrub till last as it’s one of my favourite finds (see pictured)! It is deciduous and very slow-growing but has some wonderful features. As the leaves appear in late spring, so also do the unusual bottle- brush-like white flowers which stay through to mid-summer. The leaves, which in summer resemble the shape and green of Hazel leaves, turn in autumn into a plethora of reds, oranges and yellows which I think are quite unique. We gained so much pleasure last year from watching these changes which lasted at least four to five weeks! Fothergilla thrives on acid soil and its colours are at their best in full sun but partial shade is ok too. If your garden is on alkaline soil, you could plant this shrub in ericaceous soil in a container, as you can with rhododendrons and other acid-loving plants. So I hope that my list here of flowering shrubs is helpful and has given you pointers to some beautiful plants that will add structure and interest to your garden all-year round. And I wish you a full and enjoyable growing year!
0 Comments
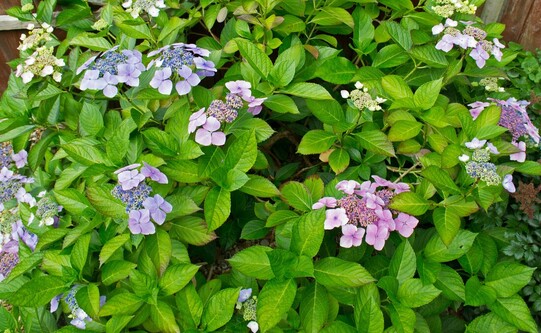  About a week ago, a friend said to me, “I know that you’re supposed to prune Hydrangeas in February.” We were in the middle of the very cold spell which has only just passed – what now seems to be known as the yearly ‘Beast from the East’, and I found myself thinking, “Well…yes…and no!”
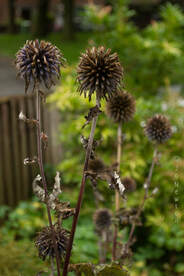
There is a general consensus with Hydrangeas that leaving the flower heads on over winter protects them from the cold, and I agree. But until when? I've seen a Hydrangea cut down in March but then damaged by very cold winds in April which 'burnt' the leaves and stems quite a way down. It was quite a sorry sight. My client and I thought we had done the right thing by pruning it in March, but in this case it looked as if we had made the wrong choice! In a way it comes down to compromise. What you don’t want to do is leave a Hydrangea well into the growing season, and then prune it. There are many plants that this is detrimental to, but most shrubs are pruned AFTER flowering anyway as flowers are there to be enjoyed! Some point from February to April is right for Hydrangeas, and a lot depends on the weather. If we’re in the throes of snow, ice or storms from the East – hold fire. If the weather starts to improve in February to March, perhaps you could prune. Check the long-range forecast first (the Met Office has a week or two local, and about a month applicable to the whole country) and if milder weather is the predominant picture, go for it. So how much should you cut off? Most people want their Hydrangeas to remain a certain size. Unless you have a huge garden you’re probably aiming at a height of about 1m (3ft) or so. Personally, because of the reason I’ve given above - the potential for late harsh weather- I would cut the stems down to about 30cms (12in) just above a pair of buds. You can leave longer stems, but Hydrangeas can become ‘leggy’. Being careful not to damage the buds themselves, the cut should be should be about 5mm (¼ in) above the buds. You can also prune away any dead wood or stems that cross each other or are damaged. Some gardeners cut down much more than this – to the first buds above ground level - the shrub will probably bounce back, but it’s up to you. The only other times you might want to lightly prune a Hydrangea is removing some flower heads if we get snow; they can get weighed down and break the stems. Or as we come towards winter you may want a few of the blooms to enjoy indoors. Other shrubs that can be treated similarly to Hydrangeas are hardy Fuchsias. They are hardy up to a point but the tops tend to die off in prolonged freezing conditions. They can be pruned down to the lowest buds and will usually be fine. Again, I prefer to give the plant a bit of leeway and leave about 12cms (4.5in) of stem. Two more shrubs to mention are Buddleia and Hypericum (St. John’s Wort). These are very hardy and are also shrubs to prune in February. They are very robust and I would have no qualms about cutting them down hard. They definitely bounce back! Once again, I hope this blog has helped you and covered what to do with some of our most popular shrubs in February through to spring. I hope you enjoy the new gardening season! 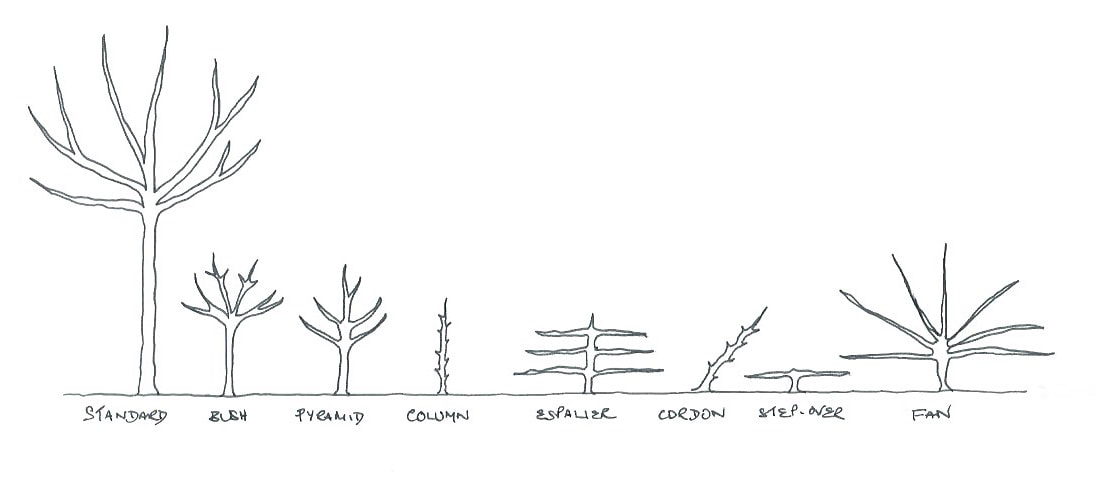 If you are thinking of buying a fruit tree, or trees, for your garden, this blog is a short guide to buying and planting at this time of year, and why. November is the time when the bare-root tree market kicks off in the UK. Nurseries are busy digging trees up now and sending them out to garden centres and direct to retail customers because they are in their ‘dormant’ phase. Throughout the spring and summer deciduous trees are in full growth, producing and storing up energy to take them through the winter. Once the leaves fall, and they are in a sleep-like state, they are less likely to be damaged by the disturbance, and besides which, it’s much cheaper to buy bare-root than pot-grown. Planting now gives them the best chance of ‘bedding in’ before they burst into growth next spring. So, here we are talking about what are known as ‘top fruit’ such as apples, pears, plums, gages, damsons and cherries, etc. as opposed to ‘soft fruit’ like raspberries, blackcurrants, etc. Fruit trees come in several different shapes and sizes, and can even be trained in various ways, but what is suitable for your garden will be determined by the size of garden, soil type, shelter and the aspect, e.g. will the tree be against a south-facing wall or are you looking for something planted out in the open? SITE & SOIL: Taking the south-facing wall as an example, this gives quite a range of trees that could be grown. South-facing gets the most sun and so is warm and very conducive to fruit-growing, but you also need to check that the soil is free-draining without becoming too dry. Avoid a position that is in a ‘rain shadow’; this is where walls prevent the rain falling on a strip of about 30cms next to the wall, and so is extremely dry. But neither do you want somewhere that is susceptible to water-logging. As with most other plants, moist but well-drained soil is desirable. Shelter is also another consideration: I’m not sure I would plant a fruit tree if I lived on a cliff-top unless I could create a substantial windbreak! You’ve seen windswept trees in exposed areas. Shelter is necessary for insects to pollinate your trees, especially as fruit trees flower early in the year. Most fruit trees are fine on neutral soil but some apples, for example, prefer neutral to slightly acidic. I think, from tests I’ve done, that Bolton and the surrounding areas are acidic but only to about 6.6 on the pH scale, so that’s not highly acidic. Our soil here is quite heavy clay though, so for much of our planting we have to incorporate soil improver or manure to encourage adequate drainage. A good soil depth is necessary for fruit trees – unrestricted to 70cms. FORMS & ROOTSTOCKS: The next things to think about when buying a fruit tree is what kind of fruit would you like to have in your garden, and also what form and therefore what rootstock is suitable and available. The form is the tree’s shape that you either buy it in or that you are aiming towards (training). The diagram at the top of the blog shows the forms that are available: standard (and half-standard), bush (and dwarf bush), pyramid (and dwarf pyramid), column, espalier, cordon, step-over and fan. It is also possible to buy a maiden tree which is a fruit tree variety grafted onto a rootstock and is only 1 year old. The graft is visible as a ‘knuckle’ about 10-20cms above the soil level line or ’nursery mark’. From there, you can train the tree into a variety of forms - particularly ideal for fans or espaliers. Buying a tree at this stage does involve training it yourself, and there are some key details to doing this that you would need to look up (or I may be able to help by passing on some more information). Rootstocks are important because they determine the eventual height, vigour and shape of the tree; they also have varying degrees of resistance to diseases and pests. They are called names like M27, MM106, Colt, Quince C, etc. So, for example, if you have space for a large apple tree, you might buy a standard on an M25 rootstock. If, on the other hand, you have a small garden and would like a Conference pear to grow as an espalier against a wall, you could buy a maiden on a Quince A. It can seem fairly complicated but all reputable fruit tree growers have all the necessary information available (see list at end). Very popular now are also ‘column’ fruit trees. These have been developed with small gardens in mind, and are as they sound: up to 2m with no side branches to maximise fruiting in a small space. They have tradenames such as Ballerina and Minarette. If you want to see some excellent examples of mature, trained fruit trees in north west England, the Walled Kitchen Garden at Tatton Park is full of them. They have huge fan-trained cherries against the walls, and many gnarly espalier apple trees trained on wires in the centre of the garden. Well worth a visit! See: https://www.tattonpark.org.uk/what_to_see_and_do/gardens/garden_areas/walled_gardens.aspx POLLINATION: Before moving onto planting, a vital note about pollination. Obviously the main point of planting fruit trees is to grow your own fruit, and this is only possible if the flowers are pollinated in spring. But most fruit tree varieties need another compatible fruit tree nearby to be flowering at the same time (something in the same pollination group). Even so-called ‘self-fertile’ varieties like Conference pear are better when in close enough proximity to a pollinating partner. So where you thought you might be buying one fruit tree, you might end up buying two or more! So check you have space for this, or that a neighbour has a tree that yours can partner with. PLANTING: Dig a hole 1m or more wide and slightly deeper than the tree's roots, breaking up the base and sides of the hole. (There is no need to dig the hole until you have the tree.) Make sure that the circle is clear of all turf and vegetation as this would seriously compete with the tree’s needs. Use some Blood, Fish and Bone fertiliser which will incorporate itself into the soil as you dig. You also need a stake which you insert well into the soil to a depth of 60cms, and lean into the prevailing wind if possible; the stake supports the tree, preventing wind rock, and is attached to the tree with a tree tie (not wires or string). Plant the tree in the centre of the hole, making sure that it is completely upright, and with the roots just below the surface (use the ‘nursery mark’ as your guide). As you do this make sure you have no air pockets, cover the roots and firm the soil well around them. Use a tree tie to tie round the stake and the tree with a spacer in between - a tree tie is a band made of plastic or rubbery material, and you can buy these together as a kit with the stake. When all is in place water well and add a thick layer of mulch. Each year as the tree grows check that the tree tie is not getting too tight, and loosen it as necessary. Planting of fruit trees can be done at any time from late autumn through to early spring. Look for a time when the weather conditions are fairly good – so not in hard frosts or snow, and not when the ground is too wet or too dry. STORING: Some fruit can be, or will need to be eaten fresh from the tree. You may want to enjoy those early apples straight away, and with plums you will probably need to get to them before the wasps do! If you have a bumper crop, you could give some away or make pies, jams, or fruit stews to freeze. Later apples and pears can be stored on racks in a cool, well-ventilated place such a shed where it is not too dry. Don’t store any that are damaged as they will rot and spoil the good fruit. If a hard frost is due you might need to throw a blanket over them for some extra protection. Storing this way can give you apples right up to blossom time next spring. This blog will not have covered everything there is to know about choosing and planting fruit trees, but it is intended as an introduction. Hopefully it will give you that springboard and encourage you to have a go at growing your own fruit. I hope you have found it helpful, and thanks for reading! Some fruit tree suppliers: www.blackmoor.co.uk www.ashridgetrees.co.uk www.walcotnursery.co.uk www.thompson-morgan.com/fruit/fruit-trees Acknowledgements: Thanks to my parents who brought me up on a fruit tree nursery in the West Country, and to love trees and other plants. And thanks to my dad, John Puckett, who fact-checked this blog for me and has provided me with additional information besides. Thank you also to Best in Horticulture and the RHS Level 2 & 3 courses in Garden Maintenance and Design. 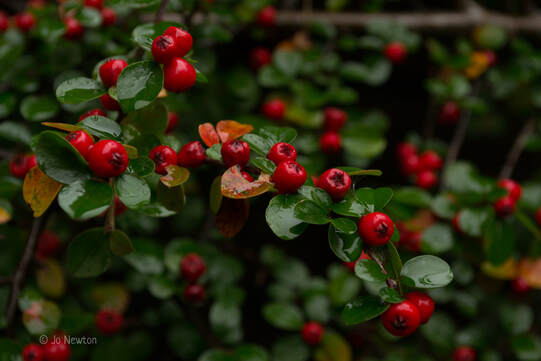 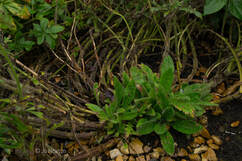 Some people may think that as summer is over, the garden is losing its cheerfulness and its draw and so gardening comes to an end. In fact, the opposite is true. October is one of the busiest gardening months, so for those of you who are still learning to navigate the gardening year, I’ve written this blog to give you a few pointers. Tidy Up One-off tidy-ups will be in demand with gardening businesses right now, but if you were to do your own, what should and shouldn’t you do? The most obvious thing to tackle is weeds. This is a good time to catch those weeds you haven’t got round to – a common observation is that weeds never seem to stop growing even when other plants do! I’ve noticed dandelions that I scraped off a few weeks ago (where I can’t get to the tap roots) are now looking rather lush again. Pull up weeds by hand or dig them out if necessary. You can lightly fork over the soil as you’re doing this, but I’ll come back to soil at the end of this blog. The next thing is knowing what to do about all your perennials. Perennials are the flowering plants that come up year after year that are not woody, e.g. lupins as opposed to lavenders which are small shrubs. Many perennials can and even should be cut back after flowering. With the example of the Scabious in the photograph, I will cut off all the old flowering stems to about 10cms and leave the new leaves that are already showing. Leaving some stem provides a bit of protection over winter, but also helps you to remember where the plant is! Some plants have a time when you can’t see them at all but the crown is still there under the soil surface, waiting to emerge into leaf next spring. The exception with perennials perhaps, is those that can provide some interest over winter in terms of structure with their attractive seed heads, such as the Echinops in the photo at the bottom of the page. These look great if we ever get a hoar frost, but they also provide food for birds. In tidying up a garden in autumn, there are a few things that are best not tidied up: any plants bearing berries; plants such as ivies (see photo below) or sedums that are still flowering; not all leaves; and lawns, which if you cut at all should now be left longer – to at least 5cms high. These features in your garden are all beneficial to wildlife. Ivy flowers well into November and so provides nectar for insects which are still around. And birds like blackbirds and thrushes will love hunting around on your lawn for leatherjackets, insects and earthworms. You may not want to leave your border absolutely covered in leaves, but if you can leave some, again, it will benefit many invertebrates, or even vertebrates in the case of hedgehogs. You may have noticed where worms have pulled down leaves into their tunnels in the soil. If you have lots of leaf-fall you could have a go at making proper leaf mould. The leaves and debris that you DO need to put into your garden waste bin are those that have been under any shrubs with signs of disease, or plants that were mildewy in summer; it’s really important to clear up these leaves so that the disease is eradicated. Apart from over-tidying, there is one thing I would NOT do this month, and that is pruning. As a general rule the time for clipping and pruning most shrubs is past; for fruit trees and any deciduous trees you need to wait until they are dormant in the winter (I’m hoping to look at this more in a blog for November). Plan and Plant October is one of the best times for planting. Perennials, bulbs and seasonal bedding. The soil is still relatively warm, so if you have some plants you’ve been dying to get in, do it now before the harsher weather arrives. The roots will still be able to grow and the plant will establish itself before winter. It’s also a good time to split perennials if you have some that have grown too big or congested, e.g. hostas, cranesbills and primulas. The way to do it will depend on what plant it is – some can virtually be chopped through with a spade; others, like primulas, need slightly more gentle treatment. Many people go out and buy spring-flowering bulbs at this time of year. Or turn out their pots that were planted up with bulbs months ago. The rule of thumb with planting most bulbs is to plant them at 3 x the depth of the bulb, so for example, as a daffodil is a large bulb, it needs planting at 15cms deep. Lots of well-known gardeners always say to plant bulbs in ‘drifts’; this is because it looks more natural, and they do look better in groups rather than dotted here and there. I don’t have room in my garden for ‘drifts’ but I do try group-planting. If you like the idea of spring bulbs looking naturalised at the edges of your lawn you could try this: lift a patch of turf with a spade (by cutting an ‘H’ shape) and peel back to reveal the soil; break up the soil and plant bulbs the right distance apart and right depth; fold the turf back over making sure the cut edges butt up against each other again. Finish by treading the turf down well and watering. Then look forward to the display next spring! Other plants that can be planted now are seasonal bedding such as pansies, violas and polyanthus. These should be hardy varieties which will cope with the cold. You can even sow hardy annual flower seeds now and get a head start on next year. I have not covered everything that can be done in the garden in October – there’s a whole raft of things could be said about fruit and vegetables – the gathering in and winter planting, but I will finish with a tip or two about soil. Autumn is a brilliant time to mulch. That is putting on a layer of manure or compost over your tidied garden beds. If you apply manure now it has chance to break down over winter, rather than in spring when it can actually scorch young leaves. Manure and compost greatly improve soil structure. Unless your soil it terribly compacted you can either leave it entirely to worms and natural processes to break it up, or you can lightly fork it in the aid the process. By doing this you retain the soil structure, including all the hard work done by worms and other organisms which help aerate the soil. And even if you have old compost in pots or bags, never throw it away – it can all go on the garden – it is never wasted. When I was doing garden maintenance for other people I would always think, “What would I do if this was my garden?” and these are the things that I would do in October/November to prepare a garden for the coming months. Thank you for reading this blog – I hope that you have found it helpful, and if you have any questions please get in touch. And enjoy autumn – both in your garden and elsewhere!
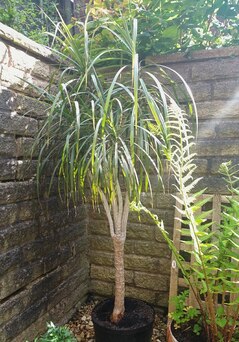
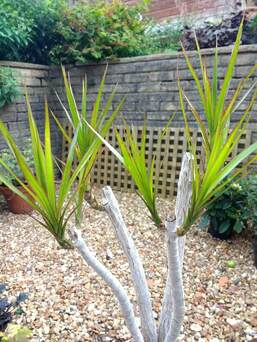
A couple of evenings ago I discovered that I had over-watered our Dracaena that was tucked away in a corner of the sitting-room; it was actually stood in water in the pot! This is no good for any houseplant, as it can make the root ball rot. So I put it outside to let it drain, and also to get more air and light. It is now out of the nice pot that it’s in in the house, and in a sheltered part of the patio (photo 1) possibly for a few weeks or maybe even until September.
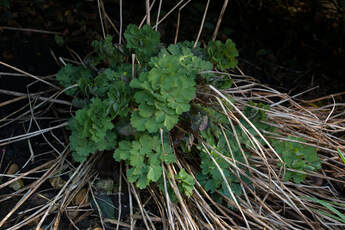
I know that now the danger of hard frosts has passed this should be absolutely fine for the Dracaena. Also, I’m fairly confident it will do well outside because two years ago I pruned it quite hard as it had become rather leggy and unattractive. I put it outdoors and after some weeks new shoots appeared (see photo 2) and it has looked better ever since. In fact, for many houseplants it is actually beneficial to give them a spell outside during the summer months. It would be even better for them if we had some rain! Many houseplants love a good, summer soak, so when you do your watering, give the whole plant a ‘shower’ at times (best done in the evening when the sunlight is not too strong). Indoors, once a week seems good for our Dracaena, but I will water it a bit more outside. Plants vary in their watering needs, so it’s best to keep an eye on them whether they’re outside or in. In terms of position, a plant that has been used to being indoors needs to acclimatise to being outdoors. Both temperature and light are the main factors to bear in mind, so your plant needs to be introduced to the differences slowly. If the nights are still very cool, take the plant back in at night at first. And it is best to put the plant in shade at first - some may need to remain in shade; others may cope with stronger sunlight once they have been out for some time. It does depend on what the plant is, and what care instructions are advised for each individual plant. And don’t forget to take them in before the weather turns cold! When you are wondering what conditions to provide for your houseplants or garden plants, a rule of thumb is to emulate the environment they would grow in naturally. For example, Rosemary and Bay Trees do well in a hot, sunny spot as they are Mediterranean-type plants. Ferns tend to need moist, shady conditions as they would naturally grow in woodland. Orchids need slightly different treatment, as in the wild they are epiphytes, growing on trees and getting their nutrients from them. Cacti grow in deserts and alpines grow on mountainsides…the list is endless! Common names for Dracaenas are ‘ribbon plant’ and ‘dragon tree’. They originate from tropical places such as Madagascar and the Canary Islands – hence ours thriving outdoors in our warmest months. I think ours is Dracaena marginata, but the massive one that apparently grows at Icod in Tenerife is the Dracaena draco. Its dark red resin is called “dragon’s blood” and in the 18th century was used to varnish the best Italian violins. I hope you have found this blog helpful. It may raise more questions – growing details for plants can be quite specific, and either myself or other gardeners who know about plants can point you in the right direction. Obviously there are a lot of good sources online too, the RHS’s website being one of them. For this blog I’ve used for my sources two old books which I dip into from time to time: Peter McHoy (ed.) 1982: The Encyclopedia of Houseplants, Octopus Books Ltd., London Lorus and Margery Milne 1967: Living Plants of the World, Thomas Nelson & Sons Ltd., London
I usually tidy up my garden before Christmas, but last year I used up my time and weather slots on other people’s gardens and didn’t get round to doing my own. Consequently, over the winter, my garden has had a rather abandoned look. And then we’ve had a mild winter. So perennials are starting to grow again and, in the case of this Aquilegia in the photograph, growing pretty quickly! Today, in mid-February, I thought it was high time to get rid of last year’s growth and have a bit of a tidy. So, why bother? Some people like their gardens to be pristine, and prefer there to be no trace of dead and decaying plants and leaves. Some people never tidy and let the new growth push its way through the old year after year. But what is best? The old stalks and leaves of perennials do need removing, preferable in the autumn, for 3 reasons:
There may be a bit of a compromise. Yes, it’s best to specifically tidy your perennials in order to look after your plants, but leave some leaf litter that will benefit your garden environment. Maybe even leave a few grassy strands or small stalks for birds to use for their nesting materials! Be tidy by all means, but not too tidy.
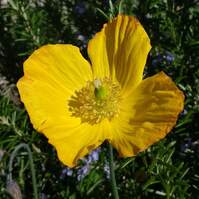
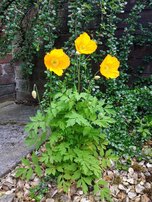
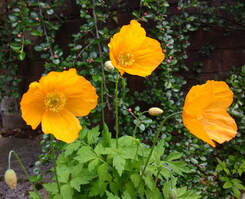
oIf you have these plants in your garden you might be wondering what you are supposed to do with them. Are they weeds? How did they get there?
The short answer is yes, they are weeds and they have a knack of self-seeding everywhere. Their Latin name is Meconopsis cambrica but they are commonly known as Welsh poppy. Most of them here in Bolton, Lancashire, seem to be orange in colour but a few are yellow. Although they are a wild species of plant growing in the UK, they are also considered ‘garden escapes’. Some people are quite happy having these growing in their garden; in fact, I am letting a few grow in mine, particularly the yellow ones which I prefer. The problem with Welsh poppies is that if you don’t remove the heads straight after a bloom has finished, they will ripen & scatter their numerous, tiny seeds everywhere – into cracks in paving or right into the middle of one of your favourite shrubs or perennials given half a chance! They also have a robust tap-root system so once they’re established they are actually quite hard to get out. If you do want to remove them, you need to dig out the whole root; like other tough plants (such as dandelions) this is almost impossible if they are growing between your paving slabs and suchlike. When this happens you may need to be content with simply chopping off as much of the plant as you can see. So yes, they are a weed, if the definition of a weed is a plant growing somewhere you don’t want it to. However, if you like Welsh poppies and are content to let them cohabit your borders where you can enjoy their cheerfulness, then let them be – maybe just keep them in check and only let them grow where you want them to grow. |
AuthorHi, I'm Jo. This is where I'll be posting my observations about my gardening life and gardening advice. Please enyoy! And if there's anything you would like to ask me about gardening I will try to answer your questions. Archives
March 2021
Categories |


 RSS Feed
